Last Updated on October 5, 2026
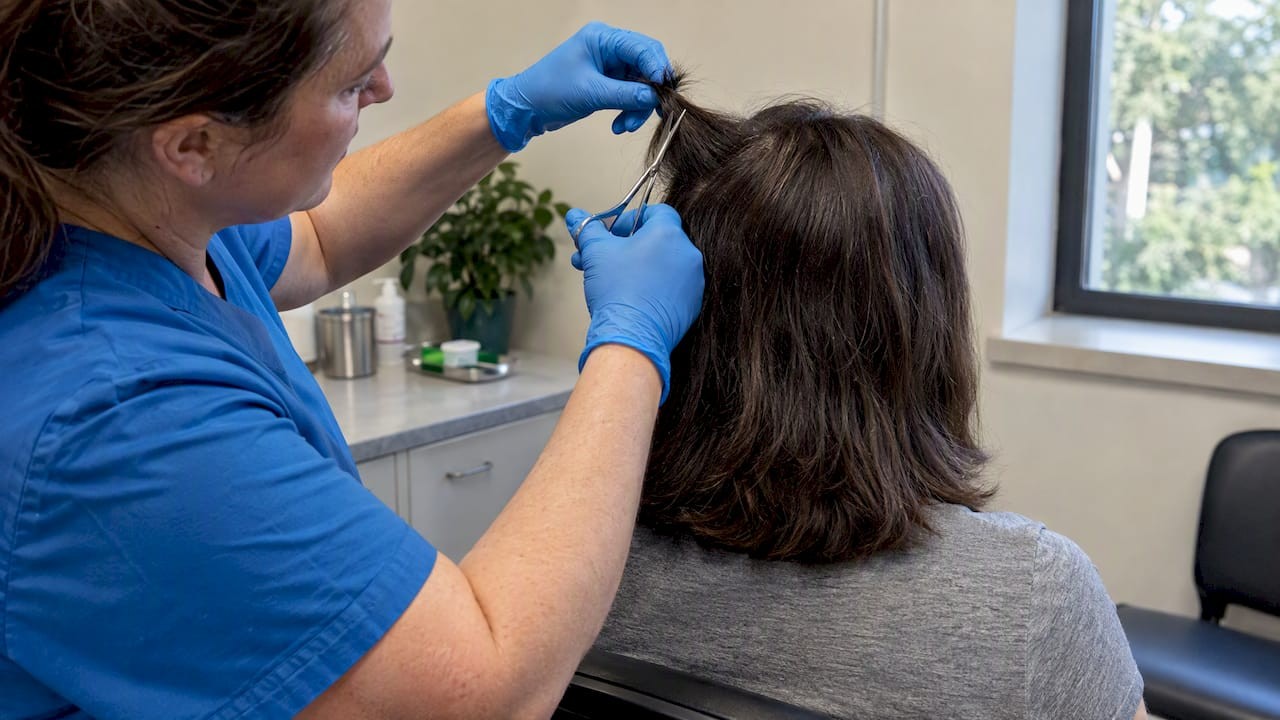
Collect a pencil-width lock of hair from the posterior vertex, cut as close to the scalp as possible, wrap in foil, label the root end, and keep it dry: that is what most labs require. This site at the back of the crown grows at the most consistent rate on the scalp, which is why it is the preferred collection point. If hair is short, braided, or otherwise nonstandard, a few adjustments below can help collect a sample that most labs will accept without specifying exact counts.
TL;DR:
- Most labs require a pencil-width lock from the posterior vertex, with 90 to 120 strands or about 50 mg of hair.
- Use clean, sharp scissors, wrap the sample in foil with the root end marked, and ensure all paperwork and seals are complete and intact.
- Collect enough hair by widening the section or combining samples if hair is short, braided, or chemically treated; synthetic extensions are not accepted.
- Proper collection and packaging—including labeling, sealing, and documentation—are crucial to prevent rejection and ensure sample integrity.
- For complex cases or uncertainties, self-checks with home kits or consultations can improve sample quality and reduce the risk of rejection.
Table of Contents
- Supplies checklist and preparatory checks before collection
- Step-by-step head-hair collection procedure from the posterior vertex
- Packaging, labeling, storage, and shipping the sample
- Special situations: short hair, braids, extensions, and body hair
- What laboratories expect and common rejection reasons
- Detection window and segmental interpretation basics
- Pro tips and practitioner perspective on collection quality
- A note on precision from Michael at Macujo
- How our kits and consultations support accurate collection
- FAQ
- Sources
Supplies checklist and preparatory checks before collection
Before you touch a pair of scissors, gather every item you need so you are not improvising mid-collection. Missing a single supply, like foil or a label, is a common reason samples get mishandled before they ever reach a lab.
- Sharp, clean scissors (stainless steel, wiped with alcohol before use)
- A length of string, dental floss, or a small elastic to tie off the lock
- Aluminum foil, cut into a sheet roughly 4 by 6 inches
- A paper envelope or tamper-evident bag for outer storage
- Nitrile or latex gloves to avoid transferring oils or residue onto the hair
- Labels or a pen for marking the root end and donor information
- A chain-of-custody or collection form, where one is required
- A comb to section hair and a mirror if you are collecting your own sample without help
Aluminum foil matters more than it looks. Plastic wrap or bags can leach plasticizers into the strands, and that kind of contamination is exactly what procedural guidance for toxicology collection warns against. Paper and foil breathe, which keeps the sample dry, while plastic traps moisture and invites mold or chemical interference.
Before cutting anything, check whether any part of the kit needs replacing. A dull scissor blade can crush strands instead of cutting them cleanly, which damages the cut end and can make root identification harder later. If a provided kit is missing foil, a label, or a custody form, request a replacement component rather than substituting household plastic wrap or tape.
Preparation also means clearing a clean, well-lit surface. Natural light or a bright lamp makes it far easier to see where the hair meets the scalp, which matters when you are trying to cut as close to the skin as possible. If the collection involves another person (an employer-mandated test, a research study, or a professional collector), confirm consent and identification before starting, and have the donor state any recent hair treatments: dyeing, bleaching, relaxing, or perming. Cosmetic treatments can alter test interpretation, and documenting them at the time of collection is standard practice precisely because labs cannot always distinguish cosmetic effects from other explanations after the fact.
Step-by-step head-hair collection procedure from the posterior vertex
Once your supplies are ready and the donor’s hair history is noted, the actual cutting takes only a few minutes if you follow a consistent sequence.
- Locate the posterior vertex. This is the crown area at the back of the head, roughly where a cowlick often forms. It is the preferred site because growth rate here varies less than at the temples or hairline.
- Section and comb the area. Use a comb to isolate a small section of hair about the width of a pencil, which corresponds to roughly 90 to 120 individual strands, enough to meet the typical 50 mg mass requirement most labs specify.
- Tie off the lock close to the scalp. Wrap string, floss, or a small elastic around the selected section as close to the skin as you can manage without pulling or causing discomfort. The tie keeps strands aligned so the root end stays identifiable after cutting.
- Put on gloves before cutting. This avoids transferring skin oils, lotion, or other residue onto the sample, which could interfere with later analysis.
- Cut with clean scissors, as close to the scalp as possible. A clean, single cut just above the tie point preserves the maximum usable length and keeps the root-proximal end intact.
- Mark the root end immediately. The moment the lock is cut, note which end was closest to the scalp. This is usually done by tying a second string around the root end or marking that side of the foil.
- Lay the lock flat on foil, root end aligned to one marked edge. Fold the foil over the hair to protect it, keeping the strands straight rather than bunched.
- Check the donor’s head for the cut. For most people, a single pencil-width lock from the posterior vertex leaves no visible gap. If the donor is self-conscious about cosmetic appearance, take the section from slightly beneath the top layer of hair so it is covered by the hair above it.
Pro Tip: Twist the lock gently clockwise before tying it off. This keeps fine or wavy strands from fanning out mid-cut, which makes the root end easier to identify and keeps strand count closer to your target.
A few hygiene details are easy to overlook but matter for sample integrity. Scissors should be wiped with alcohol between uses, especially if they have touched anything other than hair. Gloves should go on before you touch the scissors or the hair itself, not partway through the process. If string or floss touched an unclean surface, replace it rather than risk introducing an external residue onto the lock. None of these steps add real time to the process, but skipping them is one of the more avoidable ways a sample ends up questioned later.
For readers collecting their own sample without a second person’s help, a handheld mirror positioned behind the head, paired with a larger mirror in front, makes the posterior vertex visible enough to work with confidence. Kit instructions used in research settings note that asking for a helper, even briefly, significantly reduces the chance of an uneven or off-target cut.
Packaging, labeling, storage, and shipping the sample
Once the lock is cut and aligned, packaging is what protects it between collection and analysis. Labs can only test what arrives intact and properly documented, so this step deserves as much care as the cut itself.
- Wrap the lock flat in foil with the root end clearly marked, folding the foil so strands stay straight rather than crushed or bent.
- Place the foil packet inside a paper envelope, never a plastic bag, since plastics are discouraged due to plasticizer contamination risk.
- Seal the envelope inside a tamper-evident bag if one is provided, and include a desiccant packet if your kit supplies one to control moisture during transit.
- Complete every label field: donor name or ID number, date and time of collection, collector initials, and a brief note of recent cosmetic hair treatments.
- Apply any barcode or tracking label to the outer bag, not the inner foil, so it stays legible without being opened.
- Store the sealed sample at room temperature, away from direct sunlight and humidity, until it ships or is handed off.
Before sealing anything permanently, do a quick visual check: confirm the root end is marked on both the foil and the outer label, confirm the donor information is complete and legible, and confirm the bag’s tamper-evident seal is intact and unbroken. A sample that looks perfect under the foil can still be rejected if the outer paperwork is incomplete, since chain-of-custody documentation (donor ID, timestamp, collector signature) is one of the most common points of failure in otherwise well-collected samples.
If you are mailing the sample rather than hand-delivering it, avoid padded envelopes with plastic lining and skip same-day drop-offs late in the week if the lab is closed over a weekend, since a sample sitting in a warm mail facility for several days adds unnecessary risk.
Special situations: short hair, braids, extensions, and body hair
Not every donor has conveniently long, straight, chemical-free hair at the posterior vertex. A few adjustments handle the most common exceptions.
- Short hair (under 1.5 inches): Since there is less length to work with, collectors should increase the width of the section or pull from more than one site on the scalp to reach the needed mass. When hair is too short to tie off, carefully gather a small tuft and cut it directly at the base, keeping strands grouped so the root ends stay identifiable.
- Braids, dreadlocks, or extensions: Never submit synthetic extension material, since it cannot be analyzed and will cause automatic rejection. For dreadlocks or tightly braided styles, collect loose hair from the nape of the neck or from beneath a weave, where natural, unprocessed growth is accessible. Document any chemical or mechanical hair treatments, including extensions or past transplants, at the time of collection.
- Curly or coiled hair: Gently twist and align strands before tying to keep the proximal (root) end identifiable, since coiled hair tends to fan out and lose alignment more easily than straight hair.
- Body hair as an alternative: When scalp hair is unavailable, too short, or chemically treated beyond usability, body hair (commonly from the arms or legs) can serve as a substitute matrix. Body hair grows more slowly and less uniformly than scalp hair, which affects both the required mass and the detection window; segmental interpretation that works cleanly on scalp hair does not translate directly to body hair.
In every nonstandard case, the underlying goal stays the same: collect enough unprocessed, root-identifiable hair to meet the lab’s mass requirement without substituting synthetic or chemically altered material for the real thing.
What laboratories expect and common rejection reasons
Labs are looking for a specific combination of quantity, quality, and paperwork, and falling short on any one of these is enough to get a sample rejected.
- Minimum mass and strand count: Most labs want a pencil-width lock, roughly 90 to 120 strands or about 50 mg of hair, with the first 1.5 inches closest to the scalp typically used for standard analysis.
- Root-end alignment: Strands need to be gathered and cut so the proximal end is identifiable; loose, unaligned clippings make segmental interpretation unreliable.
- Insufficient mass: A sample that is too thin or too short to meet the weight requirement is one of the most frequent rejection reasons, especially with short or fine hair.
- Mixed head and body hair: Combining scalp hair with body hair in a single submission confuses the growth-rate assumptions labs rely on, and most protocols require these to stay separate.
- Missing or incomplete paperwork: No donor ID, no collection date, or an incomplete custody form is grounds for rejection even when the physical sample itself is fine.
- Unsealed or tampered packaging: A broken tamper-evident seal, or hair submitted in plastic rather than foil and paper, raises contamination concerns that labs are not willing to overlook.
- Synthetic or heavily braided material: Extensions, wigs, or tightly woven braids that cannot be separated into individual strands are not usable specimens.
A quick final check before submission catches most of these issues: confirm the mass looks adequate, confirm the root end is marked, confirm the paperwork is complete, and confirm the packaging is sealed and free of plastic. That last pass takes under a minute and prevents the most common and most avoidable rejections.
Detection window and segmental interpretation basics
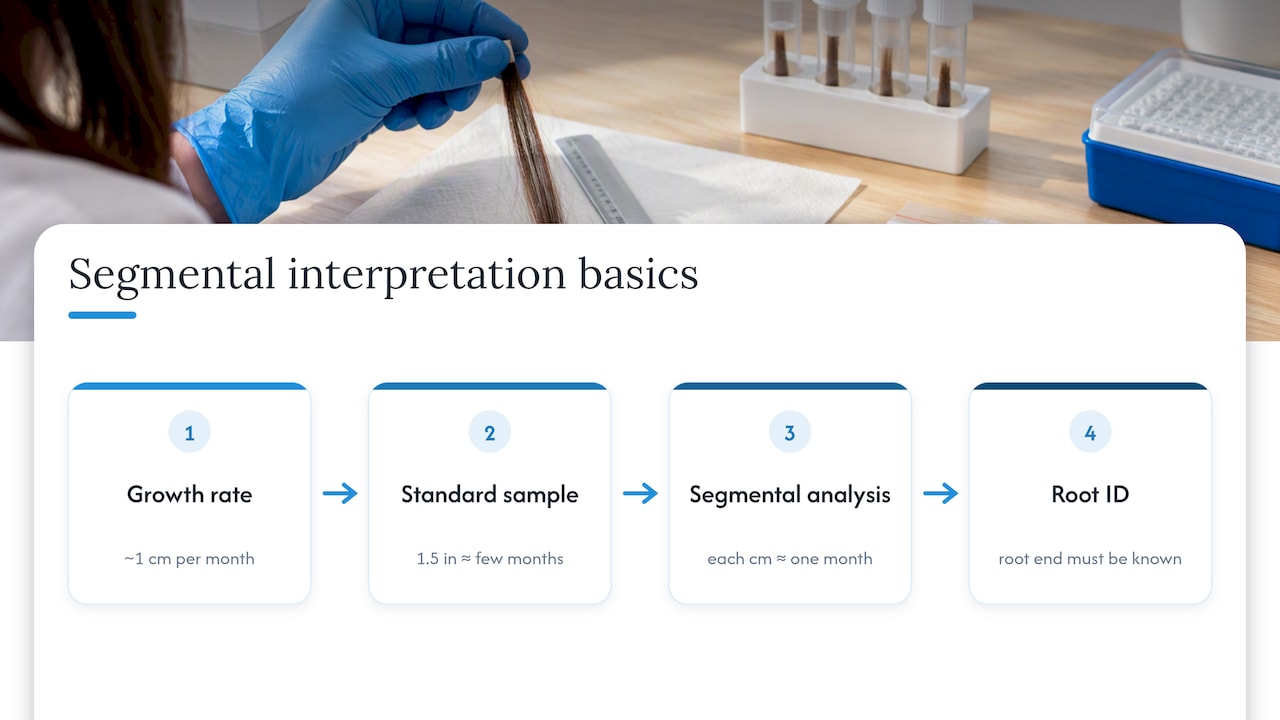
Scalp hair grows at roughly 1 centimeter per month, which is why a standard 1.5-inch sample is commonly understood to represent approximately a few months of exposure. This is the basis for hair testing’s main advantage over urine or saliva: a far longer look-back window from a single collection.
Segmental analysis builds on that same growth rate, treating each centimeter of hair as roughly one month of history. Cutting a longer sample and analyzing it in sections can, in principle, show a rough timeline of exposure rather than a single yes-or-no result. This only works reliably when the root end is correctly identified and the hair has not been cut unevenly, which is part of why alignment during collection matters as much as mass.
The limitations are real. Cosmetic treatments like bleaching or perming can alter hair structure and interpretation, environmental contamination from secondhand exposure is a recognized concern that washing procedures cannot always fully rule out, and analytical variability means results are not perfectly precise down to the week. Hair testing offers a longer window than other matrices, but it is a reflection of general exposure over months, not a day-by-day log, and understanding how drugs incorporate into hair helps explain why that distinction matters.
Pro tips and practitioner perspective on collection quality
Years of fielding questions from people preparing for hair tests surface the same handful of small mistakes again and again, most of them easy to avoid once you know to look for them.
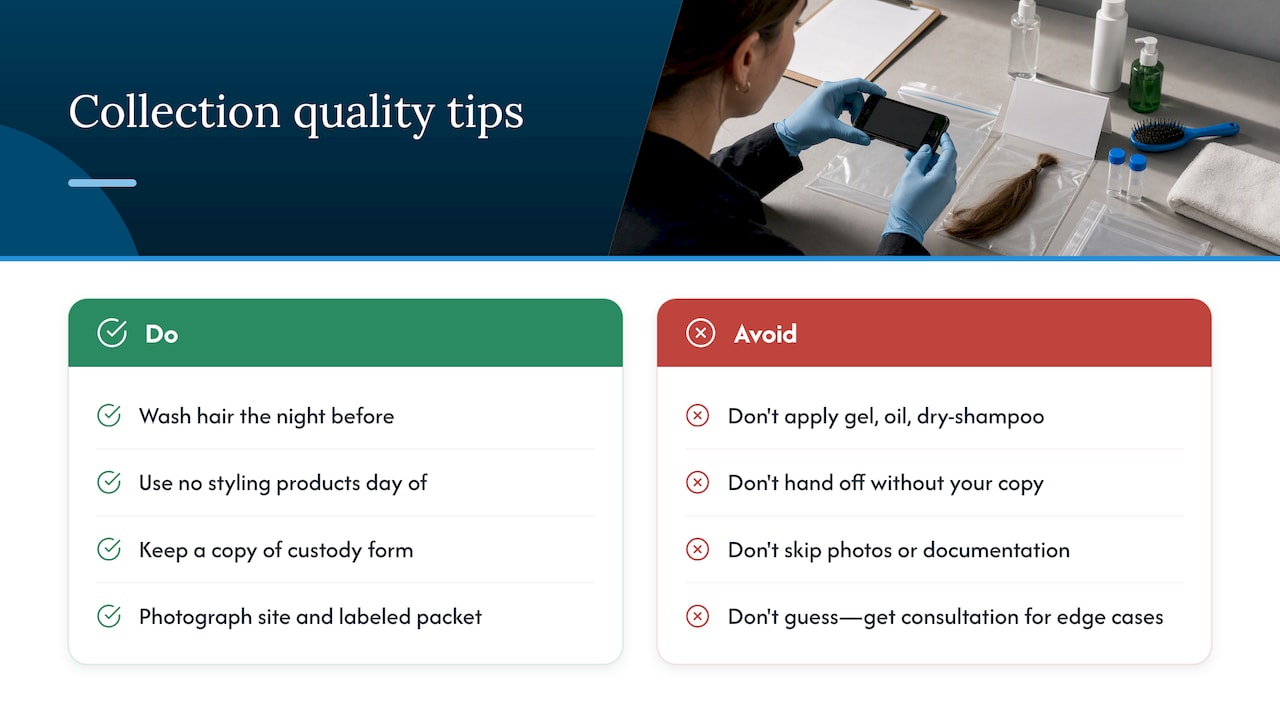
Donor preparation matters more than people expect. Washing hair the night before collection, without applying heavy styling products afterward, reduces the chance that gel, oil, or dry shampoo residue ends up as part of the sample. Product buildup at the collection site is a quiet contributor to contamination concerns, and it is entirely preventable with a plain wash and no styling product the day of collection.
Pro Tip: Keep a printed or photographed copy of the completed custody form for your own records before handing off the sample. If a dispute over paperwork ever comes up, having your own copy settles it in seconds.
Documentation is not paperwork for its own sake. It is the only record that ties a specific lock of hair, cut at a specific time, to a specific person’s recent history, and without it even a perfectly collected sample loses most of its value.
Photographing the collection site before and after cutting, along with a close-up of the labeled foil packet, creates a simple paper trail that costs nothing and takes thirty seconds. Combined with a written log of any cosmetic treatments and a saved copy of the custody form, this kind of documentation answers most questions before they are even asked.
Some situations call for more than a written guide. Short or damaged hair, prior cosmetic chemical treatments, a disputed collection, or uncertainty about how a sample will hold up under lab scrutiny are all reasons to get a second opinion before submission. An Afterhours Personal Consultation connects you with someone who has walked through these edge cases directly rather than guessing at them from a checklist.
A note on precision from Michael at Macujo
After years of walking people through hair collection and preparation questions, the pattern is always the same: the readers who run into trouble are the ones who treated alignment or documentation as optional. A sample cut carelessly, or handed over without a clear root-end mark and a completed form, puts everything else at risk no matter how carefully the rest of the process went.
I tell people the same thing every time: treat the root-end mark and the paperwork as part of the sample itself, not an afterthought attached to it. Labs are consistent about what they need. Meeting that standard the first time saves you from redoing a collection under worse conditions, often with less hair to work with the second time around.
— MIchael
How our kits and consultations support accurate collection
If you want to confirm a sample looks right before it goes anywhere, our Home Hair Test kit lets you check sample content and quality on your own timeline rather than finding out after submission that something was off. It gives you a way to self-check mass, condition, and general viability before you commit a sample to the mail or to an employer’s process.
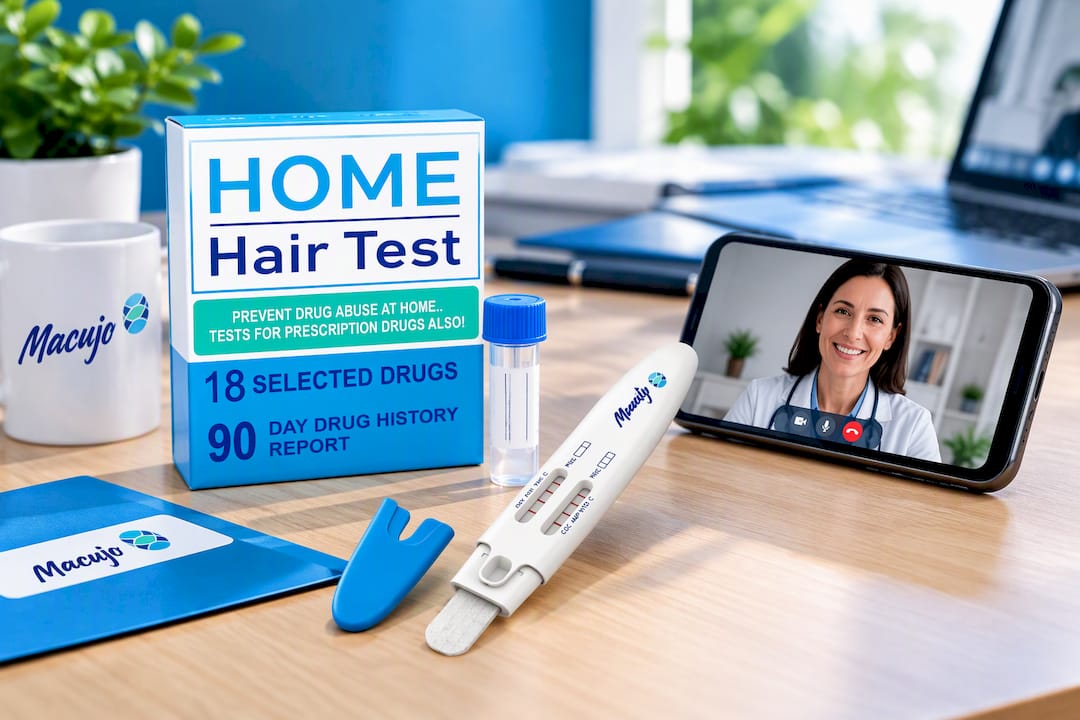
For the situations a written guide cannot fully cover, like short hair, prior chemical treatments, or questions about a specific collection you have already done, our Afterhours Personal Consultation puts you on the phone with someone who can walk through your exact circumstances rather than general advice. At $100 one-time, it is built for the moments when guessing wrong is not an option.
If your testing situation involves more than hair, our 12-Panel Multi-Drug Oral Fluid Test offers a quick self-screen you can run before a hair collection, giving you an earlier read on where you stand. Between self-testing, hands-on products, and direct phone support, we built these options so you are never collecting a sample blind.
- Check sample quality yourself with the Home Hair Test kit before you submit anything.
- Talk through edge cases directly with our Afterhours Personal Consultation.
- Get an early read with the 12-Panel oral fluid test before committing to a hair collection.
This article is general information, not a substitute for advice from a qualified doctor. Consult a qualified healthcare professional about your own circumstances before acting on anything here.
FAQ
How do I collect a hair sample correctly?
Select a pencil-width lock from the posterior vertex, tie it off close to the scalp, and cut as close to the skin as possible while keeping the root end identifiable. Wrap the cut lock in foil with the root end marked, then seal it in a paper envelope or tamper-evident bag and complete the labeling and custody form before storage or shipping.
How much hair is needed for a hair sample?
Most labs require a section about the width of a pencil, which works out to roughly 90 to 120 strands or approximately 50 mg of hair. If hair is shorter than 1.5 inches, collectors typically widen the section or combine hair from a second nearby site to reach that mass.
How many hair samples are required during collection?
A single lock from the posterior vertex is standard for most collections, since this site offers the most consistent growth rate across the scalp. Multiple small sections are only combined when hair is too short or too sparse at one site to meet the required mass.
What is the proper way to collect a hair sample when hair is braided or in dreadlocks?
Avoid cutting into the braid or dreadlock structure itself, and never submit synthetic extension material since it cannot be analyzed. Collect loose, natural hair from the nape of the neck or from beneath the style where unprocessed growth is accessible, and document the hairstyle and any extensions on the collection form.
What happens if a hair sample doesn’t meet lab requirements?
A sample that falls short on mass, lacks proper root-end alignment, or arrives with incomplete paperwork is typically rejected and a new collection is requested. Following the foil-and-paper packaging sequence and completing every label field at the time of collection is the most reliable way to avoid this outcome.
Sources
- How do hair follicle drug tests work? — DISA
- Hair sampling and analysis (PubMed entry)
- Drug testing - StatPearls - NCBI Bookshelf
- Recommendations for collecting hair samples for toxicology — FFLM (2023)